

Low Air Flow? Discover Why Your HVAC Isn’t Working Well
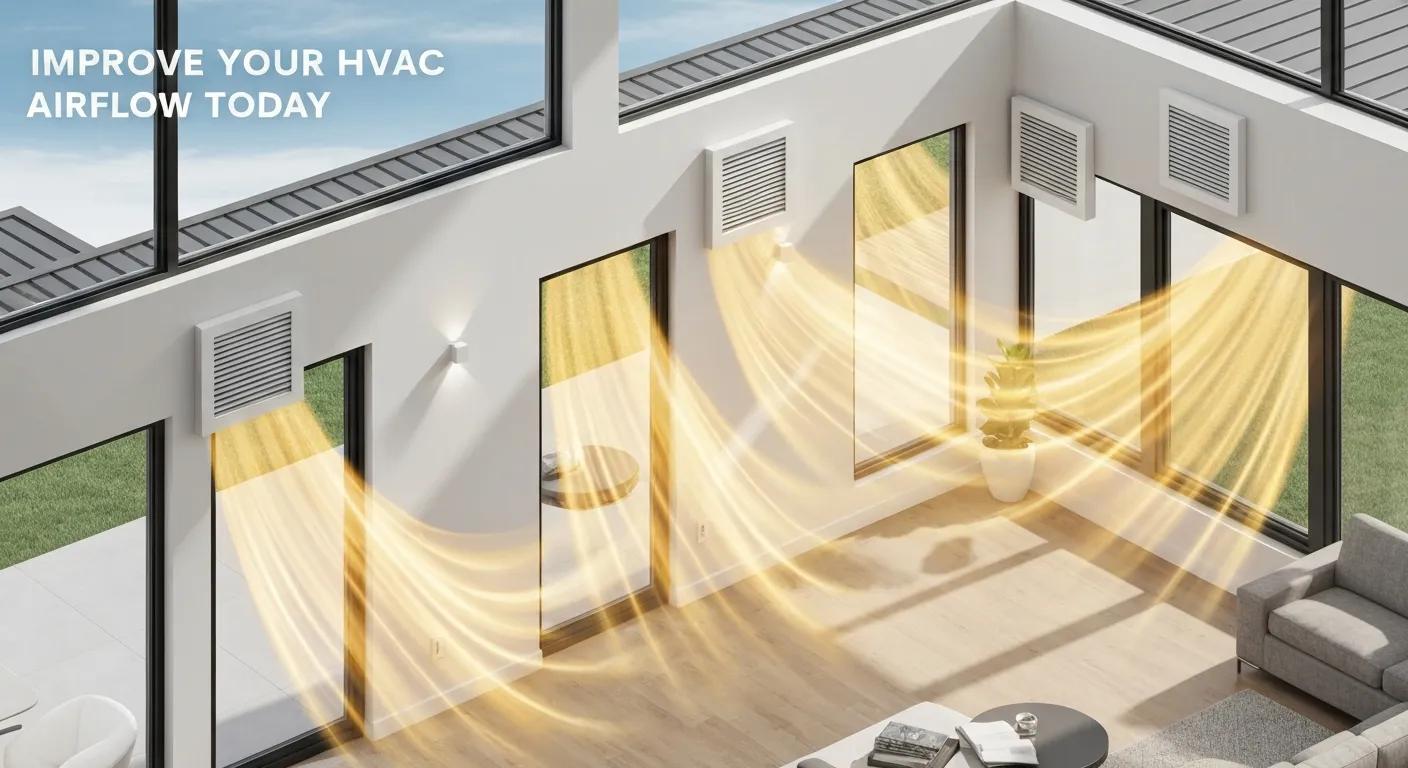
Optimize Your HVAC Airflow for Comfort and Energy Savings
Is your home feeling a little off? Maybe some rooms are too hot, others too cold, or your energy bills are climbing without explanation? Often, the culprit isn’t a broken system, but simply poor airflow. When your heating and cooling system (HVAC) can’t move enough conditioned air through your home, it directly impacts your comfort, wastes energy, and puts unnecessary strain on your equipment.
Understanding why your HVAC isn’t blowing as strongly as it should, and how issues like uneven temperatures, strange noises, or weak air from your vents connect to specific problems, can help you diagnose issues faster and choose the right fixes. The good news? Many airflow problems can be solved without replacing your entire system!
This article will walk you through the common signs of poor HVAC airflow, break down the main reasons these issues happen, and guide you through safe troubleshooting steps you can take as a homeowner. You’ll also learn when it’s time to call a professional, how regular maintenance can keep your air flowing smoothly, and how your system’s size and smart monitoring can affect your long-term comfort. Read on for practical checks—from clogged air filters to blower motor symptoms—and how-to steps that prioritize your safety and energy savings.
Is Your Home Telling You Something? Common Signs of Poor Airflow
Poor HVAC airflow often shows up as noticeable symptoms that you can spot, meaning you can often catch problems before they turn into major, costly repairs. When air isn’t moving properly, your system has to work harder and longer, leading to uncomfortable temperatures, higher energy bills, and even strange noises. Recognizing these signals early helps you stay comfortable and saves money.
Below is a quick list of the top signs to watch for, so you know what to inspect first:
- Hot and Cold Spots: If some rooms are always too warm while others are too chilly, it’s a classic sign that conditioned air isn’t reaching every corner of your home evenly. This often points to issues with how air is distributed or leaks in your ductwork.
- Weak Air from Vents: If you hold your hand up to a vent and feel only a gentle puff of air, or almost nothing at all, it means your system isn’t pushing enough air into the room. This could be due to dirty filters, blocked return vents, or a struggling fan.
- Loud or Unusual HVAC Noises: Strange sounds like humming, rattling, or squealing coming from your system can indicate problems with the fan motor, bearings, or belts, all of which directly affect how well air moves.
- High Energy Bills and Frequent Cycling: If your system runs constantly but never seems to get your home comfortable, or if it turns on and off very frequently (called “short cycling”), it’s likely struggling against an airflow restriction, wasting energy in the process.
- AC Blowing Warm or Humid Air: If your air conditioner is running but the air coming out isn’t cool enough, or if your home feels sticky and humid, it could be a combination of low refrigerant, restricted airflow, or dirty coils that prevent proper cooling and moisture removal.
These signs help you prioritize what to check in your home, starting with the easiest fixes like filters and vents before looking into ducts and motors. Recognizing these common symptoms will lead you directly to the likely root causes.
Why Do I Have Hot and Cold Spots? Understanding Airflow Balance
Uneven temperatures happen when your HVAC system can’t spread conditioned air uniformly throughout your home. This usually involves problems with your ductwork, blocked vents, or even areas in your home that gain or lose heat easily. For example, if upstairs rooms are always warmer while lower levels stay cool, it often means that not enough warm air is being pulled back to the system (return airflow) or that the ducts sending cool air upstairs are too small or blocked.
Your HVAC system works by having two main types of vents: supply vents, which push conditioned (heated or cooled) air into your rooms, and return vents, which pull stale air back to the system to be reconditioned. When there’s an imbalance—say, a blocked return vent in a warm room or a crushed supply duct—the air can’t circulate properly. You can do a simple test by feeling the airflow strength from different vents and looking for closed dampers, squished flexible ducts, or furniture blocking registers. Keeping track of which rooms are hot or cold and when these patterns occur helps pinpoint whether the issue is a simple distribution problem or a bigger system capacity issue.
Why Are My Vents Barely Blowing Air?
When you feel weak or low airflow from your vents, it’s usually caused by simple, high-impact restrictions first, followed by mechanical failures that might need tools or a technician. The most common immediate causes include a clogged air filter, blocked return grilles, or supply vents that are closed or covered by furniture. These issues make it harder for your system’s fan to push air through.
If your filters and vents are clear, then you might suspect leaky ducts, squished flexible duct runs, or a fan motor that isn’t working at full power. You might notice the fan humming, spinning slowly, or even tripping a circuit breaker. Checking if the fan sounds normal and comparing the temperature of the air coming out of your supply vents versus the air going into your return vents can help you figure out if it’s an airflow problem or something else, like a refrigerant issue.
The Role of Humidity: Why Your Home Feels Sticky
Even if your thermostat says your home is at a comfortable temperature, high humidity can make it feel much warmer and stickier. Your air conditioner doesn’t just cool the air; it also removes moisture. When airflow is poor, your AC might not run long enough or effectively enough to properly dehumidify your home. This leaves you feeling uncomfortable, even if the temperature is technically “cool.” Good airflow ensures that your system can circulate air efficiently, allowing it to remove excess moisture and make your home feel truly comfortable, not just cool.
Digging Deeper: What’s Really Causing Your Airflow Problems?
Poor HVAC airflow comes from specific component failures and issues with your ductwork, each reducing the amount of air delivered or making your system work harder. To fix the problem, you need to match the symptoms you’re seeing to the right part of your system—whether it’s filters, ducts, the fan, or even the coils. This way, you fix the real restriction instead of just treating the symptoms.
The following table organizes common causes by what you might notice and how each problem restricts airflow, making it easy to quickly scan when you’re trying to figure out what to inspect or fix.
| Component | What You Might Notice | How It Stops Airflow |
|---|---|---|
| Air filter | Weak air from vents, system working harder | Gets clogged with dust and debris, making it harder for air to pass through to the system. |
| Ductwork | Hot/cold spots, whistling noises, dusty areas near seams | Leaks let conditioned air escape, while blockages or crushed ducts stop air from reaching rooms. |
| Blower motor | Humming sounds, fan spinning slowly, circuit breaker trips | Motor or electrical issues reduce the fan’s speed, so it can’t push enough air. |
| Evaporator coil | Warm air from AC, coils look frosty | Dirty coils make it hard for air to pass through and for heat to be exchanged, reducing cooling and airflow. |
| Vents/registers | Weak or no air in specific rooms | Closed or blocked vents prevent air from entering the rooms where it’s needed. |
This comparison shows that checking your filters and duct integrity are often the most effective first steps, while issues with the fan motor and coils might need professional tools for an accurate diagnosis. The next sections will look at each cause and highlight what you can do as a homeowner.
The Simplest Fix: Your Clogged Air Filter
Air filters are designed to catch dust and allergens, but as they get full, they create a “choke point” that makes it much harder for your system’s fan to pull air through. This reduces the amount of air that actually gets circulated through your home. If you use a high-quality filter (with a higher MERV rating) for better indoor air quality, you might need to change it more often, especially if you have pets or allergies, because these filters trap smaller particles and clog up faster.
The easiest way to check is to hold your used filter up to a light—if you can barely see through it, it’s time for a new one! You’ll often notice improved airflow from your vents and a quieter system after a filter swap. Replacing filters regularly, based on your household’s activity, often restores normal airflow without needing any further intervention.
HVAC Fault Detection and Diagnosis: Causes, Methods, and Classifications
In Heating, Ventilation, and Air Conditioning (HVAC) systems, faults can be occurred due to various reasons such as drift deviation, valve/fan failure,water clogging,air filter obstruction, temperature sensor failure and so on. Similarly in electrical machineries faults can be occurred due to multiple causes such as phase reversal, over or under voltage, starter open/short circuit, bearing problems, insulation breakdown, overloading, thermal unbalance, environmental as well as other technical issues. The faults analysis at various stages of electrical systems are critically important for reliable operation of the system. In view of reliability and safety operations of modern sophisticated electrical systems, faults analysis and its diagnosis are necessary to avoid unaccountable losses. The faults at various stages, its causes, methods of detection and diagnosis, fault classifications are included in this work. The comment on effectiveness methods of detection of fault an
Leaky Ducts and Blockages: Wasting Your Conditioned Air
Your ductwork is like the highway system for your conditioned air. Problems with ducts reduce your system’s efficiency by letting heated or cooled air escape into unconditioned spaces (like your attic or crawl space) or by creating blockages that reduce the amount of air reaching your rooms. Common places for leaks and blockages include joints, where ducts connect, or squished or kinked flexible ducts hidden behind walls.
You might notice dust buildup near duct seams, whistling noises, or a significant temperature difference between the air in your ducts and the air in your rooms. It’s common for older systems to lose 20–30% of their air through leaks! Sealing and realigning ducts reduces the workload on your system’s fan and improves how much air actually gets delivered to each room. A visual inspection and simple smoke or tissue tests at your vents can help you spot big leaks or blockages before you consider professional sealing.
When Your System’s ‘Heart’ is Struggling: Blower Motor Issues
The blower motor and fan assembly are the “heart” of your system’s airflow. When the motor starts to fail—due to worn parts, a bad capacitor (which helps it start), or electrical issues—it reduces the fan’s speed and, therefore, how much air it can push. You might notice humming sounds, inconsistent fan speeds, increased vibration, or even your circuit breaker tripping. These signs often come with reduced airflow, even if your filters are clean and vents are open.
A common issue is a failing capacitor, which can make the motor struggle to start or run at full speed. Worn bearings or belts (in some older units) can also create noise and drag, further reducing airflow. If you notice these motor-related symptoms, listening to the fan and comparing the air pressure across your system can help indicate whether a repair or a full motor replacement is needed.
Don’t Block the Flow! Vents and Registers
Blocked or partially closed supply vents (registers) and return vents create local restrictions that force air into fewer outlets. This can increase pressure in some ducts while “starving” other rooms of conditioned air. Everyday culprits include furniture placed over supply registers, rugs covering floor vents, painted-over return grilles, or curtains blocking wall vents. These human-caused blockages are easy to fix but often overlooked.
A quick checklist includes making sure all your registers are open, clearing any obstructions, and ensuring return grilles aren’t covered by furniture or decor. Correcting these simple issues can restore balanced airflow immediately. A common misconception is that closing vents in unused rooms saves energy or redirects air to other rooms. In reality, this often increases pressure in your ductwork, making your system work harder and less efficiently overall. It’s generally best to keep all registers open to allow for proper air distribution.
Ready to Fix It? Your Homeowner’s Troubleshooting Guide
Troubleshooting weak HVAC airflow follows a logical, safety-first approach: start with simple checks you can do yourself, which cover most common causes, then move on to more targeted inspections, and finally, call in professionals for mechanical or sealed-system issues. The first steps focus on filters, vents, and returns; the second phase looks at duct integrity and how your fan is behaving; the final phase involves coils, refrigerant, and motor replacement. Below is a practical guide and a DIY table to help you decide which tasks to try yourself and which to save for a trained technician.
| Repair Task | DIY Difficulty | Tools Needed | Estimated Time |
|---|---|---|---|
| Replace air filter | Low | Replacement filter, gloves | 10–20 minutes |
| Clear blocked vents | Low | Vacuum, screwdriver | 15–30 minutes |
| Inspect accessible ducts | Medium | Flashlight, mirror, tape measure | 30–60 minutes |
| Test blower motor startup | Medium/Low | Basic multimeter (safety caution) | 30–60 minutes |
| Seal major duct leaks | Medium/Professional | Mastic or foil tape, access | 1–3 hours (varies) |
This table helps you prioritize tasks you can safely complete yourself and flags those that typically require professional tools or ladder access. Always start with filter and vent work, then use the checklist in the following sections to progress methodically.
Step-by-Step: Changing Your Air Filter
Replacing an air filter is a quick, impactful fix that restores airflow by removing the accumulated dust and debris that makes it hard for your system to pull air. You’ll need the correct-size filter (check the dimensions on the old one), disposable gloves, and a flashlight to inspect the filter slot. For safety, always turn your system off before you start, and be careful not to damage the delicate coil fins when replacing filters.
- Power Down: Turn off your HVAC system at the thermostat and, if possible, at the breaker.
- Locate and Remove: Find your filter slot (often at the air handler, in a return vent, or in the furnace) and slide out the old filter.
- Inspect: Hold the old filter up to the light. If it’s dark and clogged, it’s definitely time for a change.
- Insert New Filter: Slide the new filter in, making sure the airflow arrow on the filter frame points in the direction of the air handler (usually towards the furnace/AC unit).
- Restart and Observe: Turn your system back on and notice if the airflow from your vents improves and if your system runs more quietly.
Changing your filter regularly—monthly for heavy use or pets, quarterly for typical households—prevents rapid re-clogging and protects your fan and coils from strain.
Clearing Vents and Checking Your Ducts
Clearing blocked vents and doing a basic duct inspection can restore balanced airflow and help you spot obvious damage or routing issues that are stopping air from flowing properly, all before you need to call a technician. Start by moving any furniture or rugs that are blocking your supply or return vents. Vacuum the grilles and returns, and open any closed dampers. Then, use a simple tissue or smoke test (like blowing out a candle near the vent) to confirm airflow direction and how strong it feels.
For ducts you can easily reach (like in an unfinished basement or attic), visually check for squished flexible runs, disconnected joints, or insulation that has fallen into the pathway. Mark any suspicious seams for professional sealing if you notice large leaks or heavy dust escaping. If you find collapsed flexible ducting, consistently weak air to multiple rooms, or large gaps, it’s time to consider professional duct sealing and cleaning to get back lost airflow and efficiency.
When to Call in the Pros: Knowing Your Limits
Some airflow problems require licensed technicians because they involve specialized systems, electrical dangers, or component replacements that affect your safety and warranty. Professional help is definitely needed for things like refrigerant leaks, major duct repairs, replacing your fan motor, persistent airflow problems after you’ve tried simple fixes, and anything involving gas furnaces or high-voltage electrical work.
- Refrigerant leaks, evaporator/condenser coil issues, and sealed-system faults need certified handling to avoid environmental problems and ensure your system works correctly.
- Major duct repairs, re-routing, or a full system rebalance are typically beyond what a DIYer can handle and benefit greatly from a professional’s airflow measurements and testing.
- Electrical faults, repeated circuit breaker trips, or suspected motor failure pose safety risks and should always be handled by technicians with the right equipment and training.
| Issue | Why a Professional is Needed | Typical Cost Range (estimate) |
|---|---|---|
| Refrigerant leak | Requires special tools to find the leak and certified handling of chemicals. | $200–$800+ depending on leak and recharge |
| Blower motor replacement | Involves safely disconnecting electricity, choosing the right motor, and balancing it. | $400–$1,200+ depending on unit |
| Major duct overhaul | Requires access, sealing, possibly new ducts or re-routing. | $500–$4,000+ depending on scope |
| Electrical control faults | Needs diagnostic instruments and safe handling of electrical components. | $150–$600 depending on repair |
When you’ve tried the basic DIY checks and multiple symptoms still persist—especially warm air with weak flow, repeated circuit breaker trips, or visible frost on your coils—it’s time to schedule a professional evaluation. This prevents the problem from getting worse and saves you from wasting time on fixes that won’t work.
Inefficient HVAC Performance: Causes and Energy Saving Potential
Building HVAC systems account for more than 30% of annual energy consumption in United States. However, it has become apparent that only in a small percentage of buildings do HVAC systems work efficiently or in accordance with design intent. Studies have shown that operational faults are one of the main reasons for the inefficient performance of these systems. It is estimated that an energy saving of 5 to 15 percent is achievable simply by fixing faults and optimizing building control systems.
Complex Issues: Why Experts Are Essential
Problems involving the sealed refrigeration system, tricky electrical faults, or replacing major components usually need an expert diagnosis because they involve safety, environmental concerns, or your system’s warranty. Handling refrigerants requires special certification, and diagnosing sealed-system issues involves pressure testing, finding tiny leaks, and precisely recharging the system with calibrated tools. Similarly, complex motor control boards, variable-speed fan drives, or advanced electrical faults require specialized meters and manufacturer-specific troubleshooting steps to avoid misdiagnosis. Calling a technician early for these types of failures often reduces your total repair cost compared to repeated failed DIY attempts.
How Pros Tackle Big Problems Like Leaks and Motor Issues
Technicians use systematic methods—like electronic leak detectors, UV dyes, or pressurizing the system—to find refrigerant leaks. Once found, they repair the leak, vacuum the system to remove moisture, and then precisely recharge it to restore proper pressure and efficiency. For fan motor failures, professionals evaluate the motor’s electrical current, check the health of the capacitor, and ensure the fan is balanced. They then recommend either a repair or a full replacement based on how the motor is performing and how much life it has left.
Typical service steps include isolating the faulty component, performing the necessary repairs or replacements, re-testing the air pressure and airflow, and verifying that the system is working correctly under normal operation. The time it takes varies by how complex the issue is, but well-documented diagnostics and precise repairs will restore your airflow much more reliably than trial-and-error fixes.
Keep It Running Smoothly: The Power of Preventative Maintenance
Regular preventative maintenance is key to avoiding common airflow problems. By keeping your filters, coils, and ducts clean and in good working order, you save energy and reduce wear and tear on your system. Scheduled tasks help maintain good air pressure, keep your system efficient at heating and cooling, and can uncover small leaks or motor issues before they turn into expensive repairs. The table below offers a homeowner-focused maintenance schedule for filters, coils, and ducts, prioritizing seasonal tasks and suggesting more frequent checks for homes with pets or allergies.
| Maintenance Task | Recommended Frequency | Benefit |
|---|---|---|
| Air filter replacement | Monthly to quarterly (based on filter type and use) | Keeps air flowing easily and protects your fan. |
| Evaporator/condenser coil inspection | Annually (before cooling season) | Ensures efficient cooling and prevents airflow blockages. |
| Duct inspection & sealing | Every 2–3 years or after renovations | Reduces air leaks, improves air delivery, and saves energy. |
| Blower and motor check | Annually | Detects wear, ensures correct fan speed and balance. |
Routine maintenance restores proper airflow and reduces how long your system needs to run, which in turn lowers your energy consumption and extends the life of your HVAC system.
Your Maintenance Calendar: Filters, Coils, and More
Filter and coil maintenance should be scheduled around how you use your home. Homes with pets, allergies, or heavy use will need more frequent filter changes to prevent air pressure from building up too quickly. A practical calendar looks like this: check filters monthly and replace them every 1–3 months depending on how dirty they get. Inspect your indoor (evaporator) and outdoor (condenser) coils annually, and clean them before the peak cooling or heating season to avoid airflow problems. For example, a household with pets might replace filters monthly if using high-quality filters, while a home with fewer occupants might only need to change them quarterly. Following this schedule keeps your air flowing smoothly, improves your indoor air quality, and reduces stress on your fan and compressor.
Ductwork Check-Ups: Protecting Your Investment
Regular duct inspections catch leaks, squished sections, and insulation problems early, allowing you to seal or repair them before your air distribution suffers and energy is wasted. Inspect seams, the main air boxes (plenums), and any accessible flexible ducts for dust trails, gaps, or disconnected joints. If you find consistent dust or noticeable temperature differences around these areas, plan for sealing or professional repair. Insulating ducts in unheated or uncooled spaces (like attics) also helps keep the air at the right temperature as it travels, which improves comfort and reduces how long your system needs to run. Regular inspections every 2–3 years—or after any home renovations—maintain proper airflow balance and reduce the need for expensive, emergency repairs.
Beyond Airflow: The Benefits of Fresh Air and Good Ventilation
While fixing your HVAC airflow is crucial for comfort and efficiency, considering how fresh air enters and circulates through your home can further enhance your indoor environment. Good ventilation and fresh air intakes play a vital role in air quality, humidity control, and overall health.
Why Fresh Air Intakes and Proper Ventilation Matter
Modern homes are built to be very airtight for energy efficiency, which is great for keeping conditioned air in, but it can also trap stale air, pollutants, and excess humidity inside. This is where fresh air intakes and proper ventilation come in:
- Improved Indoor Air Quality: Fresh air intakes bring in outdoor air, diluting indoor pollutants like VOCs (volatile organic compounds) from cleaning products, pet dander, and cooking odors. This helps you breathe easier and can reduce allergy symptoms.
- Humidity Control: Proper ventilation, especially in moisture-prone areas like bathrooms and kitchens, helps remove humid air before it can spread throughout your home. This works hand-in-hand with your HVAC system to keep your home feeling less sticky and prevents mold growth.
- Balanced Air Pressure: Exhaust fans (like those in bathrooms) can create negative pressure, pulling air from unintended places. A balanced ventilation system, sometimes including a fresh air intake, helps maintain neutral pressure, ensuring your HVAC system works as designed without fighting against pressure imbalances.
- Reduced Stale Air: Simply put, fresh air makes your home feel lighter and more pleasant. It prevents that “stuffy” feeling that can occur in tightly sealed homes.
While your HVAC system conditions the air, good ventilation ensures that the air it’s conditioning is fresh and healthy. Discussing these options with an HVAC professional can help you integrate them effectively into your home’s overall comfort strategy.
The Right Fit: Why System Sizing Matters for Comfort
The size of your HVAC system fundamentally determines how much air it can move and how much heating or cooling it can provide for your home. If your system is too big or too small for your home’s needs, it can lead to problems like short cycling (turning on and off too often), not enough runtime to properly dehumidify, or simply being unable to keep your home at the set temperature. Understanding these sizing consequences helps you interpret airflow symptoms and guides decisions about whether you need duct adjustments, zoning, or even a different-sized replacement system.
Too Big or Too Small? The Sizing Dilemma
An oversized system is like having a race car for city driving—it hits the temperature quickly but then shuts off too soon. This “short cycling” means it doesn’t run long enough to properly remove humidity, leaving your home feeling clammy and uncomfortable, even if the temperature is technically correct. It also puts more wear and tear on the system from frequent starts and stops.
An undersized system, on the other hand, is constantly struggling. It runs almost non-stop but still can’t deliver enough airflow or maintain comfortable temperatures, especially during peak heat or cold. This increases energy use and wears out components faster, all while failing to keep you comfortable.
Duct sizing also plays a huge role. Ducts that are too small for a powerful system will restrict airflow, and ducts that are too large for a smaller system won’t move air effectively. Both scenarios create air pressure issues regardless of the equipment’s size. Proper calculations of your home’s heating and cooling needs, combined with correctly sized ductwork, ensure your system can both move the right amount of air and maintain perfect thermal comfort and humidity levels.
Smart Homes, Smart Airflow: How Technology Helps
Smart thermostats and modern sensors can be powerful allies in monitoring and improving your home’s airflow. They track how long your system runs, remind you when to change filters, and some can even alert you to unusual airflow or pressure issues before you even notice a drop in comfort. By analyzing patterns in how your system runs, temperature differences, and how often it cycles, smart devices can tell you if your fan is working harder than it should or if a filter change is overdue, prompting you to take action.
Some advanced systems can even integrate with predictive maintenance platforms that spot trends—like a gradual decrease in airflow over several months—which could signal a slowly wearing motor or developing duct leaks. Using smart monitoring as an early-warning system helps homeowners schedule maintenance at the right time and avoid the discomfort and higher energy bills that come with degraded airflow.