

Enhance Efficiency: 7 Must-Know Air Conditioning Repair Tips
7 Essential AC Repair & Maintenance Tips to Maximize Efficiency
A dependable air conditioning system keeps a home comfortable, reduces energy bills, and prevents costly emergency repairs when maintained properly. This guide explains seven essential air conditioning repair and maintenance tips every homeowner should know, showing how routine tasks and timely interventions preserve system components like the condenser unit, evaporator coil, compressor, and ductwork. Homeowners who understand filter selection, condenser cleaning, thermostat optimization, air sealing, diagnostics for noises and smells, and when to call a professional can extend equipment life and improve indoor air quality and energy efficiency. The article maps practical how-to steps, safety-first troubleshooting flows, seasonal checklists, and simple diagnostic rules so you can act confidently—whether performing a basic filter change, clearing debris around the condenser, or documenting symptoms before a technician visit. Read on for practical, snippet-friendly answers to common questions like how often to change filters, how to clean the outdoor unit safely, thermostat optimization, detecting and sealing leaks, and red-flag smells or noises that require immediate attention.
How Often Should You Change Your Air Filter to Improve AC Performance?
A clean air filter is a primary defense for HVAC maintenance: it traps particulates, preserves airflow, and protects the evaporator coil from dust buildup that reduces heat transfer and increases energy draw. Regular filter changes improve indoor air quality, reduce strain on the compressor, and can lower energy consumption by several percent when compared to operating with a clogged filter. Best practice is a baseline replacement interval combined with condition checks—factors such as pets, allergies, occupancy, and filter type change the cadence. Below are actionable replacement intervals and simple inspection steps homeowners can follow to maintain filtration and system airflow.
When to inspect and change a filter:
- Every 1 month: For homes with pets, smokers, or occupants with allergies.
- Every 2–3 months: Typical single-family home with moderate use.
- Every 6–12 months: High-efficiency washable filters when manufacturer allows cleaning.
These intervals are starting points; visually inspect the filter monthly and replace sooner if visibly dirty or airflow is reduced. A quick check behind the return grille should become part of seasonal maintenance, leading into the next section on which filter types best match your home and goals.
What Types of Air Filters Are Best for Home AC Systems?

Selecting the right filter balances particulate capture, airflow restriction, and cost; common options include fiberglass, pleated, and washable filters, with MERV ratings indicating relative filtration efficiency. Pleated filters generally offer better filtration than basic fiberglass while maintaining reasonable airflow, making them a practical choice for many homeowners; high-MERV filters trap smaller particles but may reduce airflow in older systems not designed for them. HEPA-style or very high-MERV filters can improve indoor air quality significantly but should be evaluated against your system’s fan capability to avoid undue strain. Consider the household’s priorities—allergy reduction, pet dander control, or maximizing efficiency—and choose a filter type and MERV rating that the HVAC blower can support.
| Filter Type | Typical MERV Range | Cost & Replacement Frequency | IAQ Impact |
|---|---|---|---|
| Fiberglass panel | 1–4 | Low cost; replace every 1–3 months | Basic dust capture; minimal allergy control |
| Pleated disposable | 5–11 | Moderate cost; replace every 1–3 months | Good balance of filtration and airflow |
| High-MERV / HEPA-style | 12–17 | Higher cost; replace 3–12 months | Superior particle removal; may affect airflow |
| Washable/reusable | Variable | Upfront cost; clean monthly | Reusable but variable performance; maintenance required |
This table shows trade-offs: higher filtration usually means better IAQ but can impact airflow and energy use. Choose a filter that aligns with your system’s capacity and household health needs, then schedule regular checks to maintain performance.
How Does a Clean Air Filter Impact Indoor Air Quality and Energy Efficiency?
A clean air filter maintains unrestricted airflow, which lowers the blower motor’s run time and reduces compressor stress—mechanically this improves heat exchange at the evaporator coil and keeps the system operating near its designed SEER performance. Recent studies and industry guidance indicate that operating with clogged filters can increase energy consumption modestly and contribute to more frequent component wear; keeping filters clean mitigates these effects and stabilizes indoor humidity and particulate levels. For example, replacing a heavily soiled filter can restore several percentage points of efficiency and noticeably improve airflow and comfort in rooms farthest from the unit. Monitoring filter condition regularly ties directly into overall IAQ strategy and sets up the next topic of outdoor condenser maintenance, since both indoor filtration and outdoor coil cleanliness combine to dictate total cooling effectiveness.
What Are the Best Practices for Cleaning and Maintaining Your Outdoor AC Condenser Unit?
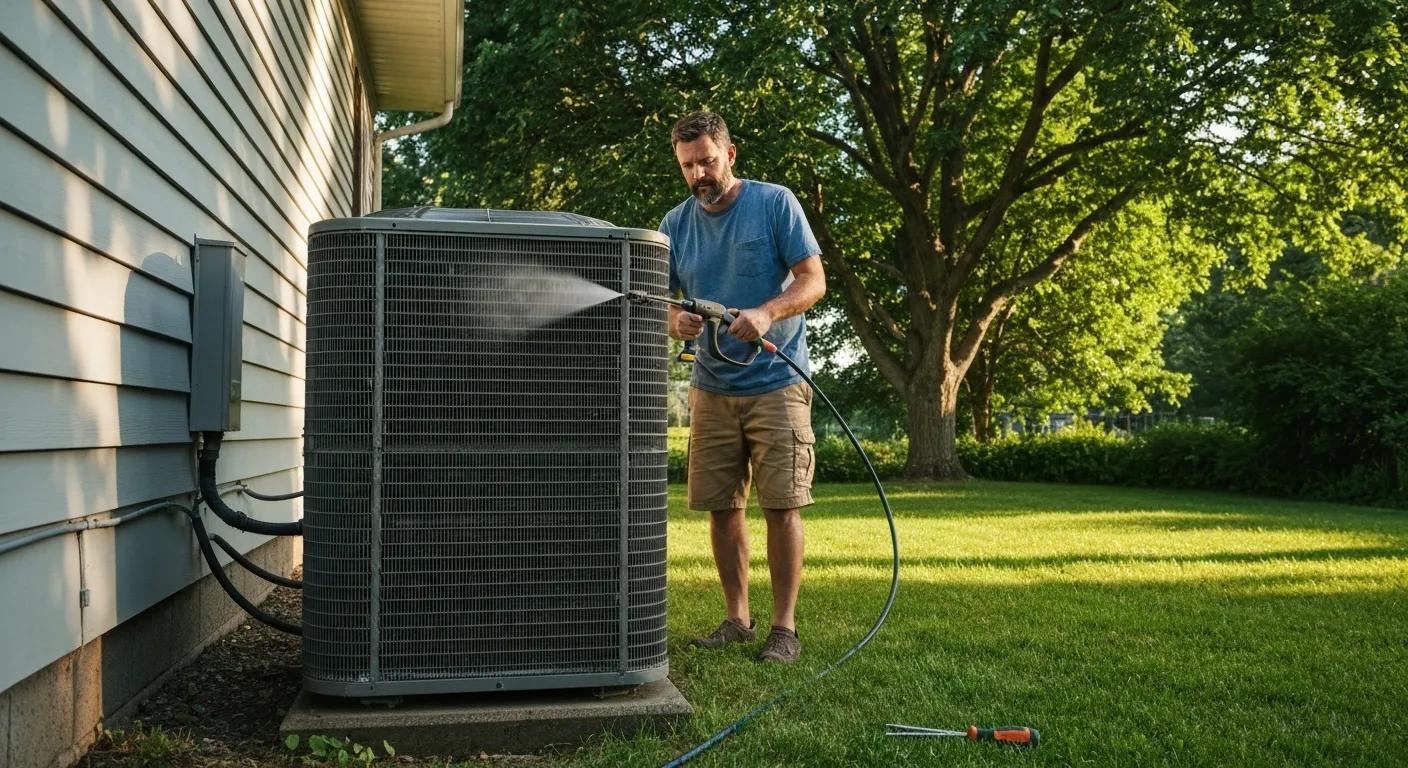
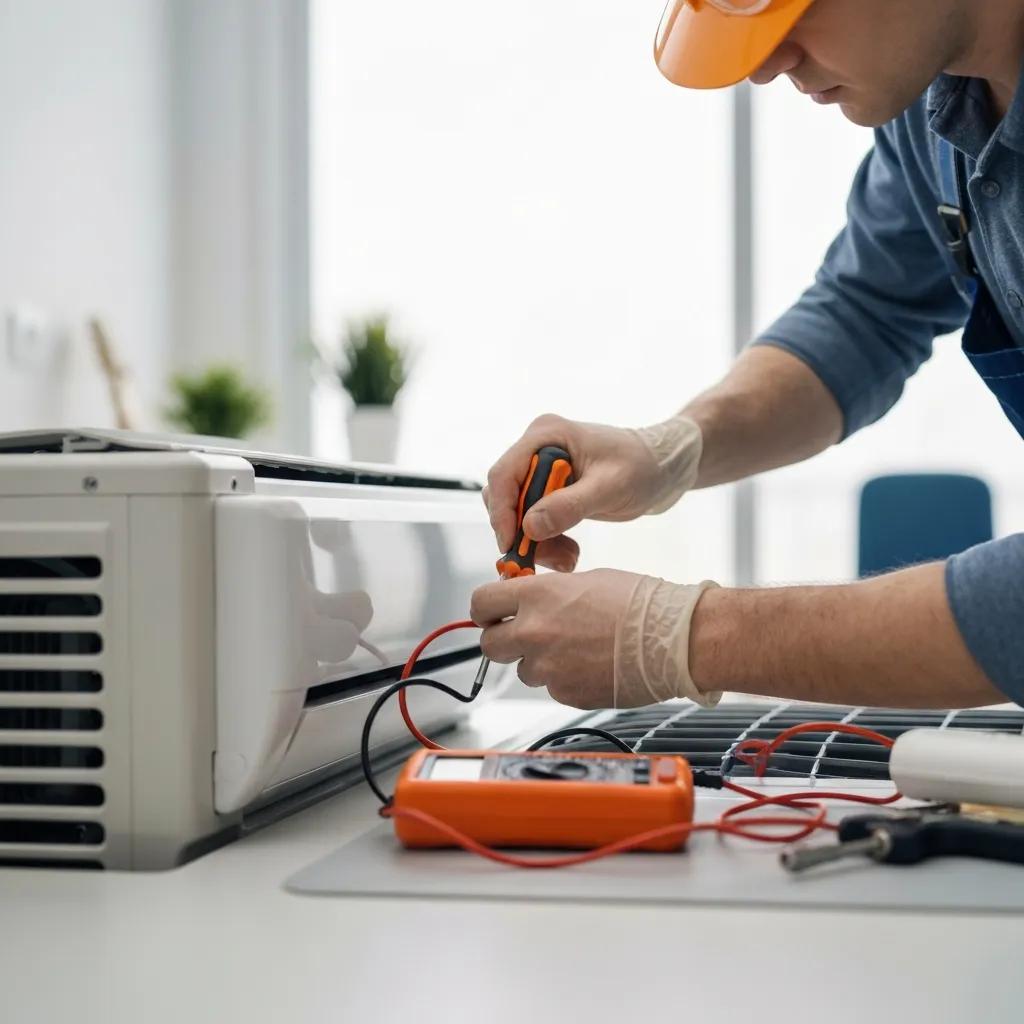
The outdoor condenser unit is a critical HVAC component whose condition directly affects compressor load and system efficiency; cleaning and maintaining it involves clearing debris, ensuring proper clearance, and careful coil/fins cleaning to preserve airflow and heat rejection. Before any work, always isolate power at the disconnect and use appropriate personal protective equipment—this safety-first step prevents electrical hazards and protects the technician or homeowner. Seasonal maintenance includes trimming vegetation to maintain 2–3 feet of clearance, removing leaves and grass clippings, and straightening bent fins gently with a fin comb when needed. If coils are heavily soiled, a soft-bristle brush and manufacturer-compatible coil cleaner remove grime without damaging delicate fins; refrigeration-system issues such as refrigerant leaks or compressor anomalies should trigger a professional service call.
| Maintenance Task | Tools Required | Frequency | Risk Level |
|---|---|---|---|
| Debris clearing & vegetation trimming | Gloves, shears, broom | Monthly (spring–fall) | Low |
| Coil/fin cleaning (light) | Soft brush, coil cleaner, garden hose | Annually (pre-season) | Medium |
| Inspect electrical connections & disconnect | Multimeter, insulated tools | Annually (pre-season) | High (electrical) |
| Leveling base & checking mounting pads | Level, wrench | Annually | Low |
This table helps prioritize what you can safely do and what is higher risk. Routine, low-risk tasks keep the condenser performing well and reduce the chance of heat-exchange losses that pressure the compressor, leading naturally into common visible problems and homeowner-level troubleshooting.
How Can You Safely Clear Debris and Ensure Proper Clearance Around the Condenser?
Start every outdoor maintenance session by shutting power at the disconnect to prevent accidental motor starts or electrical shock; wearing gloves and safety glasses minimizes injury risk when handling debris and vegetation. Remove leaves, grass clippings, and loose debris with a soft brush or your hands; avoid poking objects into the fins or fan housing. Trim shrubs and branches to keep a 2–3 foot perimeter clear around the unit and ensure the top is unobstructed for proper airflow; check that the concrete pad remains level and that water drains away from the base. These safety-first clearance steps improve heat rejection, reduce cycling, and delay corrosion—leading to fewer performance problems and less need for repair.
What Are Common Signs of Outdoor Unit Problems and How to Troubleshoot Them?
Common outdoor symptoms include the unit failing to start, short cycling, loud grinding noises, or visible ice formation on lines; each symptom maps to likely causes like capacitor failure, fan motor issues, refrigerant problems, or airflow restriction. Homeowner troubleshooting begins with simple checks: confirm the thermostat setting and breakers, inspect the disconnect for tripped fuses, and look for obvious physical damage to fins or wiring. If the unit hums but fan doesn’t spin, a capacitor or motor issue is likely and requires professional intervention; ice on the coil suggests low refrigerant or poor airflow, which should prompt shutdown and a service call. These checks are safe entry-level diagnostics that help determine urgency while avoiding high-risk actions, and they lead into optimizing thermostat controls for overall efficiency.
How Can Programmable and Smart Thermostats Optimize Your Home AC Efficiency?
Programmable and smart thermostats act as the control component of an HVAC system by managing setpoints, schedules, and demand to reduce run time while maintaining comfort; they optimize energy use by shifting setpoints during unoccupied periods and using adaptive features to match daily routines. Programmable thermostats follow pre-set schedules to automatically raise or lower temperature setpoints, while smart thermostats add remote control, learning algorithms, and integration with occupancy sensors or geofencing for finer efficiency gains. Implementing proper scheduling and setbacks reduces compressor cycles and lowers cooling energy, translating to utility savings and decreased wear. The next paragraphs explain basic troubleshooting for thermostat issues and outline optimal settings to maximize comfort and efficiency.
Key optimization tips:
- Use setbacks: Increase cooling setpoint 4–6°F while away to save energy.
- Night profiles: Leverage higher nighttime setpoints if comfortable, reducing overnight runtime.
- Smart integration: Use geofencing or occupancy sensing to prevent unnecessary conditioning.
These steps are practical for most homes and segue into basic thermostat troubleshooting techniques when control problems arise.
What Are the Basic Troubleshooting Steps for Thermostat Issues?
Start thermostat troubleshooting by confirming power: check batteries in battery-powered units and verify the circuit breaker for the HVAC system is on to rule out simple power failures. If the thermostat displays errors or is unresponsive, reset it per manufacturer instructions or remove and reinstall batteries, then confirm wiring connections if you are comfortable and the system is powered off. For smart thermostats, ensure Wi-Fi connectivity and app firmware are current; if the thermostat commands the system but the unit does not respond, the issue may be at the HVAC control board, transformer, or relay—components that usually require a certified technician. Document error codes and behaviors to speed diagnosis and to provide clear information to a service professional when escalation is needed.
What Are the Optimal Thermostat Settings to Save Energy and Maintain Comfort?
Optimal setpoints balance comfort and energy savings: a common recommendation is 78°F during occupied summer hours and 82–85°F when the home is empty, with modest adjustments based on personal comfort and humidity control needs. For programmable thermostats, create weekday and weekend schedules that reflect occupancy patterns; for smart thermostats, enable learning or geofencing features and set hold times conservatively to prevent excessive cycling. Use fan settings strategically—’auto’ conserves energy while ‘on’ can help with air circulation but increases fan runtime. Implementing these settings can reduce cooling energy use while maintaining acceptable comfort levels, and will naturally improve system longevity by avoiding short cycling and unnecessary compressor stress.
How Do You Identify and Seal Air Leaks to Improve AC Airflow and Cooling Efficiency?
Air leaks in a home envelope and ductwork degrade system airflow and force the HVAC system to run longer to meet setpoints, increasing energy use and uneven comfort; identifying and sealing leaks restores balance and reduces load on the blower and compressor. Common detection methods include visual inspections of duct seams, smoke tests or incense pencils near suspect gaps, and noting rooms that never reach the thermostat setpoint while others overcool. Prioritize sealing high-impact locations like large duct joints, attic penetrations, and exterior door thresholds, and use appropriate materials—mastic or UL 181 tape for duct seams and caulk or weatherstripping for building envelope leaks. These targeted sealing steps increase effective airflow and complement indoor filter and condenser maintenance to create an efficient overall cooling system.
Detecting leaks checklist:
- Visually inspect supply and return duct seams in accessible areas.
- Use a smoke pencil or incense to detect moving air near suspected gaps.
- Check attic and crawlspace penetrations, recessed lights, and around window frames.
Sealing these priority leaks improves airflow substantially and leads into the role of vents and balanced ventilation for system performance.
What Are the Common Areas for Air Leaks in Ductwork and Home Envelope?
Priority leak points include duct joints, flexible duct connections, plenum seams, attic and basement penetrations, and poorly sealed windows and exterior doors; each can cause measurable loss of conditioned air before it reaches living spaces. Duct leaks in unconditioned spaces are especially damaging because they dump cooled air into attics or crawlspaces, increasing runtime and creating uneven temperatures. Quick homeowner inspections focus on visible gaps at registers, loose duct connections, and signs of dust accumulation around seams that indicate leakage. Sealing these areas with mastic or approved foil tape and adding insulation where ducts run through unconditioned spaces reduces cooling losses and works together with thermostat scheduling to improve whole-home efficiency.
How Does Proper Ventilation and Unobstructed Air Vents Affect AC Performance?
Proper ventilation and open registers maintain system balance by ensuring designed supply and return airflow pathways remain unobstructed, preventing pressure imbalances that can stress the compressor and fan. Furniture blocking a supply register or closed vents in unused rooms may seem to save energy but can cause higher return temperature and restrict airflow, prompting the system to run longer; instead, partially closing registers and using zoning strategies or dampers are better-balanced approaches. Regularly cleaning and vacuuming registers, ensuring return grills are unobstructed, and avoiding permanent closure of multiple vents preserves airflow and reduces short cycling. This attention to vents and ventilation ties directly into diagnosing noises and smells that warn of system distress, discussed next.
What Are the Warning Signs of Unusual AC Noises or Smells and When Should You Call a Professional?
Unusual noises or smells from an AC system often indicate developing faults; a structured symptom-to-cause mapping helps homeowners decide whether to perform safe checks, turn off the system, or call for immediate professional service. Some sounds and odors are benign and fixable at the homeowner level, while others—like electrical burning or refrigerant chemical smells—are hazardous and require prompt shutdown and certified technician intervention. Below is an EAV-style mapping that lists common noises and smells, likely causes, immediate homeowner actions, and urgency levels to guide safe decision-making.
| Symptom (Noise/Smell) | Likely Causes | Immediate Homeowner Action | Urgency |
|---|---|---|---|
| Hissing (refrigerant-like) | Refrigerant leak or pressure release | Turn off system, ventilate space, do not run AC | Immediate professional |
| Grinding or screeching | Motor bearings or fan blade contact | Turn off system, visually inspect for debris | High (professional likely) |
| Banging or thumping | Loose panel, compressor short cycle | Turn off and inspect panels; note when it occurs | Professional within days |
| Burning electrical smell | Overheated wiring, capacitor failure | Turn off power at breaker/disconnect immediately | Immediate professional |
This table clarifies urgency and recommended actions; when hazardous signs appear, local safety steps come first and contacting a certified HVAC technician is essential. The following subsections explain diagnostic steps for noises and interpretation of smells.
How to Diagnose Common AC Noises Like Grinding or Hissing?
Grinding noises typically point to failing motor bearings, debris contacting the fan, or a worn belt in older blower assemblies; hissing often signals a refrigerant leak, pressure release, or air escaping under pressure. Safe homeowner checks include shutting power, visually inspecting the outdoor fan for debris, and verifying that access panels are secure; never open sealed refrigeration components or probe electrical systems while powered. If the noise persists after basic checks or the sound suggests refrigerant issues—hissing near refrigerant lines—turn the system off and consult a professional. Documenting when the noise occurs (start-up, steady run, shutdown) helps technicians diagnose root causes faster.
What Do Strange AC Smells Indicate About Potential System Problems?
Different smells point to different system pathologies: musty odors usually indicate mold or bacterial growth on the evaporator coil and in the condensate drain, burning smells suggest electrical overheating or motor failure, and sweet or chemical odors can signal a refrigerant leak. Immediate homeowner responses emphasize safety: ventilate the area, turn off the HVAC system if the smell is chemical or burning, and avoid restarting until a qualified technician inspects the unit. For musty smells, cleaning or flushing the condensate drain and replacing the filter often resolves issues temporarily, but persistent odors merit professional coil cleaning and microbiological remediation. Clear identification of the smell and its timing helps prioritize repair and prevent health or safety risks.
Why Is Scheduling Annual Professional AC Maintenance Crucial for Longevity and Efficiency?
Annual professional AC maintenance provides comprehensive inspection and preventative service that protects major components—compressor, condenser coil, evaporator coil, refrigerant circuit, electrical connections, and blower assembly—reducing unexpected failures and preserving efficiency. A certified technician performs tests and calibrations that homeowners usually cannot do safely, such as measuring refrigerant charge, testing capacitor health, and verifying electrical amp draw; these diagnostics catch emerging problems before they become costly breakdowns. Scheduling tune-ups in the spring prepares the system for peak cooling loads and ensures safe operation, offering a documented record of service that supports warranty compliance and long-term system health. Below is an outline of common service tasks technicians perform, plus a practical checklist of credentials and services to request when hiring a certified HVAC technician.
What Services Do HVAC Technicians Provide During Annual Tune-Ups?
During a standard annual tune-up, technicians typically:
- Inspect and replace/advise on filters to restore proper airflow for energy efficiency.
- Clean evaporator and condenser coils to improve heat transfer and cooling capacity.
- Check refrigerant charge and look for leaks, ensuring the system has correct pressure.
- Test electrical components and connections, tightening or replacing as required.
- Lubricate moving parts, check blower motor and belts, and verify adequate airflow.
- Clear and flush condensate drain lines to prevent backups and microbial growth.
After reading about technician services, homeowners should know what to expect and request during a visit to ensure comprehensive care and proper credentials. (Integration Point — professional hire checklist) When scheduling a professional annual service, ask for technicians who are certified and insured, request written lists of performed tasks and measurements taken (e.g., refrigerant pressures, amp draw), and confirm that they will provide a diagnostic summary. This short checklist helps homeowners verify qualifications and ensures the visit covers filter checks, coil cleaning, refrigerant inspection, electrical testing, thermostat calibration, and drain-line clearing—items essential to preventive maintenance.
When Is It Time to Call a Certified HVAC Technician for Repairs?
Call a certified HVAC technician immediately for hazardous or complex issues such as electrical burning smells, refrigerant leaks (chemical or sweet odor), compressor failure symptoms, or persistent no-cool conditions despite normal thermostat operation. For declining performance—reduced airflow, rising utility bills, or repeated short cycling—schedule a professional visit soon to prevent escalations. Before calling, gather essential information to help the technician diagnose remotely and prepare: note the system model and age if available, record error codes displayed on the thermostat, describe exact symptoms (noises, smells, frequency), and take photos of visible damage or labels. This documentation speeds diagnosis, prioritizes parts, and supports clear communication during the service call.
These red-flag criteria balance immediate safety actions with practical steps for efficient professional resolution, and they close the loop on the homeowner maintenance and troubleshooting workflow presented in this guide.
About the Author: Jason E.
Jason E. brings over two decades of invaluable experience to the residential and commercial HVAC field. His extensive career is marked by a deep understanding of air conditioning systems, encompassing everything from intricate installations and complex repairs to advanced air quality management and preventative maintenance strategies. Jason’s expertise ensures optimal performance and longevity for HVAC systems, contributing significantly to energy efficiency and indoor comfort.
Beyond his technical prowess, Jason has distinguished himself as a respected leader and entrepreneur within the HVAC industry. He has successfully managed and operated multiple HVAC companies, demonstrating exceptional business acumen, strategic planning, and a commitment to delivering superior customer service. His leadership has fostered teams dedicated to excellence, making him a trusted authority in the field.
Frequently Asked Questions
What are the benefits of using a smart thermostat over a traditional one?
Smart thermostats offer several advantages over traditional models, including remote access via smartphone apps, learning capabilities that adapt to your schedule, and energy usage reports. They can optimize heating and cooling based on occupancy patterns, which can lead to significant energy savings. Additionally, many smart thermostats integrate with home automation systems, allowing for seamless control of your HVAC alongside other smart devices. This level of control and efficiency can enhance comfort while reducing energy bills.
How can I tell if my air conditioning system is too small for my home?
Signs that your air conditioning system may be undersized include inconsistent cooling throughout your home, frequent cycling on and off, and high energy bills. If certain rooms remain warm while others are cool, or if the system struggles to maintain the set temperature, it may not be adequately sized for your space. A professional HVAC technician can perform a load calculation to determine the appropriate size for your home, ensuring optimal performance and comfort.
What should I do if my AC unit is leaking water?
If your AC unit is leaking water, it could indicate a clogged condensate drain line, a damaged drain pan, or low refrigerant levels. First, turn off the system to prevent further damage. Check the drain line for blockages and clear them if possible. Inspect the drain pan for cracks or rust. If the issue persists, or if you suspect a refrigerant leak, contact a certified HVAC technician for a thorough inspection and repair to avoid water damage and ensure proper operation.
How can I improve the energy efficiency of my AC system?
Improving the energy efficiency of your AC system can be achieved through several strategies. Regular maintenance, such as changing filters and cleaning coils, is essential. Additionally, sealing air leaks in your home, using programmable or smart thermostats, and ensuring proper insulation can significantly enhance efficiency. Consider upgrading to a high-efficiency unit if your current system is old. Lastly, using ceiling fans to circulate air can help maintain comfort without overworking your AC.
What is the average lifespan of an air conditioning unit?
The average lifespan of a well-maintained air conditioning unit is typically between 15 to 20 years. Factors such as the quality of installation, frequency of maintenance, and usage patterns can influence this lifespan. Regular professional maintenance can help extend the life of your system by ensuring it operates efficiently and identifying potential issues before they become major problems. If your unit is approaching the end of its lifespan, consider evaluating replacement options to maintain comfort and efficiency.
What are the common causes of AC system short cycling?
Short cycling occurs when an air conditioning system turns on and off frequently without completing a full cooling cycle. Common causes include an oversized unit, a malfunctioning thermostat, dirty air filters, or refrigerant issues. An oversized unit cools the space too quickly, causing it to shut off prematurely. Regular maintenance, including cleaning filters and checking refrigerant levels, can help prevent short cycling. If the problem persists, consult a professional technician for a thorough diagnosis and solution.
How can I tell if my AC needs refrigerant?
Signs that your AC may need refrigerant include reduced cooling efficiency, ice formation on the evaporator coils, and hissing or bubbling noises. If your system is running but not cooling effectively, it may indicate low refrigerant levels. Additionally, if you notice an increase in energy bills without a corresponding increase in usage, it could be a sign of refrigerant issues. Always consult a certified HVAC technician to check refrigerant levels and address any leaks safely.